

 Image 1 of 1
Automotive Smoke Tests (EVAP / Intake / Vacuum)
Automotive Smoke Tests
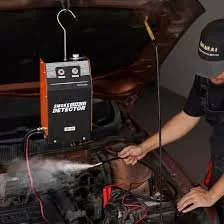
What is an automotive smoke test? An automotive smoke test uses a controlled smoke source to introduce visible vapor into a vehicle’s intake, exhaust, EVAP, or vacuum systems to locate leaks. The smoke travels out of any openings, making even small cracks, loose fittings, or missing gaskets easy to find. Technicians use dedicated smoke machines designed for vehicle diagnostics to produce oil-based or glycol-based smoke that is safe when used properly.
When to perform a smoke test
Check Engine Light related to EVAP system codes (P0440, P0442, P0455, etc.)
Hard starting, rough idle, or vacuum-related drivability issues
Poor fuel economy with no other clear cause
Unexplained exhaust odors or visible fumes in the cabin
After repair or replacement of intake manifold, vacuum hoses, EGR components, or EVAP lines
Diagnosing leak sources after visual inspection and pressure testing are inconclusive
Types of systems commonly tested
EVAP system (evaporative emissions): charcoal canister, purge valve, hoses, gas cap seal, vent solenoid and lines
Intake manifold and vacuum lines: gaskets, hose connections, brake booster line, PCV system
Exhaust system (where permitted): welds, flanges, gasket seals
Turbocharger and intercooler piping: hose clamps, couplings, charge pipes
Heater core and HVAC ducting (cabin smoke testing to find cabin air leaks)
How a smoke test is performed (typical steps)
Preliminary checks: scan for codes, inspect hoses and fittings, verify fuel level and safety conditions.
Isolate the system: install adapters or caps to seal off the system being tested (fuel lines, EVAP ports, intake).
Introduce smoke: connect the smoke machine to the service port or vacuum/EVAP line and introduce smoke at a controlled pressure/flow.
Observe leak points: visually inspect for smoke exiting joints, cracks, connections, gaskets, or seams; use gloves and a flashlight for tight spots.
Confirm and repair: mark the leak location, perform the repair (replace hose, tighten clamp, replace gasket, etc.).
Re-test: reintroduce smoke to confirm the repair fixed the leak.
Clear codes and test-drive if required.
Safety considerations
Use smoke machines designed for automotive diagnostics; do not use open flames or improvised smoke sources.
Ensure proper ventilation—do smoke testing outdoors or in a well-ventilated shop area.
Avoid pressurizing fuel system components with smoke; isolate fuel lines and follow manufacturer service procedures.
Use appropriate adapters and pressure limits to avoid damage to sensors, seals, and delicate components.
Wear eye protection and gloves when working in the engine bay.
Common findings and fixes
Loose gas cap: replace or tighten cap; clear EVAP codes.
Cracked vacuum hose: replace hose and clamps.
Faulty purge or vent solenoid: test and replace solenoid.
Damaged EVAP canister or lines: replace damaged components.
Intake manifold gasket leak: remove manifold, replace gasket, torque to spec.
Exhaust flange or gasket leak: replace gasket or repair welds.
Benefits of professional smoke testing
Locates small or hidden leaks that are difficult to find by sight or pressure testing alone.
Reduces time spent chasing intermittent or elusive problems.
Prevents unnecessary parts replacement by pinpointing the true failure point.
Helps restore emissions compliance and improve drivability and fuel economy.
When to bring it to a shop If you have a persistent Check Engine Light related to EVAP or vacuum systems, ongoing drivability problems, or noticeable fuel odors, a professional smoke test can quickly locate the issue. Properly
Automotive Smoke Tests
What is an automotive smoke test? An automotive smoke test uses a controlled smoke source to introduce visible vapor into a vehicle’s intake, exhaust, EVAP, or vacuum systems to locate leaks. The smoke travels out of any openings, making even small cracks, loose fittings, or missing gaskets easy to find. Technicians use dedicated smoke machines designed for vehicle diagnostics to produce oil-based or glycol-based smoke that is safe when used properly.
When to perform a smoke test
Check Engine Light related to EVAP system codes (P0440, P0442, P0455, etc.)
Hard starting, rough idle, or vacuum-related drivability issues
Poor fuel economy with no other clear cause
Unexplained exhaust odors or visible fumes in the cabin
After repair or replacement of intake manifold, vacuum hoses, EGR components, or EVAP lines
Diagnosing leak sources after visual inspection and pressure testing are inconclusive
Types of systems commonly tested
EVAP system (evaporative emissions): charcoal canister, purge valve, hoses, gas cap seal, vent solenoid and lines
Intake manifold and vacuum lines: gaskets, hose connections, brake booster line, PCV system
Exhaust system (where permitted): welds, flanges, gasket seals
Turbocharger and intercooler piping: hose clamps, couplings, charge pipes
Heater core and HVAC ducting (cabin smoke testing to find cabin air leaks)
How a smoke test is performed (typical steps)
Preliminary checks: scan for codes, inspect hoses and fittings, verify fuel level and safety conditions.
Isolate the system: install adapters or caps to seal off the system being tested (fuel lines, EVAP ports, intake).
Introduce smoke: connect the smoke machine to the service port or vacuum/EVAP line and introduce smoke at a controlled pressure/flow.
Observe leak points: visually inspect for smoke exiting joints, cracks, connections, gaskets, or seams; use gloves and a flashlight for tight spots.
Confirm and repair: mark the leak location, perform the repair (replace hose, tighten clamp, replace gasket, etc.).
Re-test: reintroduce smoke to confirm the repair fixed the leak.
Clear codes and test-drive if required.
Safety considerations
Use smoke machines designed for automotive diagnostics; do not use open flames or improvised smoke sources.
Ensure proper ventilation—do smoke testing outdoors or in a well-ventilated shop area.
Avoid pressurizing fuel system components with smoke; isolate fuel lines and follow manufacturer service procedures.
Use appropriate adapters and pressure limits to avoid damage to sensors, seals, and delicate components.
Wear eye protection and gloves when working in the engine bay.
Common findings and fixes
Loose gas cap: replace or tighten cap; clear EVAP codes.
Cracked vacuum hose: replace hose and clamps.
Faulty purge or vent solenoid: test and replace solenoid.
Damaged EVAP canister or lines: replace damaged components.
Intake manifold gasket leak: remove manifold, replace gasket, torque to spec.
Exhaust flange or gasket leak: replace gasket or repair welds.
Benefits of professional smoke testing
Locates small or hidden leaks that are difficult to find by sight or pressure testing alone.
Reduces time spent chasing intermittent or elusive problems.
Prevents unnecessary parts replacement by pinpointing the true failure point.
Helps restore emissions compliance and improve drivability and fuel economy.
When to bring it to a shop If you have a persistent Check Engine Light related to EVAP or vacuum systems, ongoing drivability problems, or noticeable fuel odors, a professional smoke test can quickly locate the issue. Properly performed smoke testing protects vehicle systems and provides a clear path to repair.
Harrison MVAC Service and Repairs LLC performs comprehensive smoke testing with industry-standard equipment, experienced technicians, and documented results to ensure leaks are found and reliably repaired. Contact our shop for diagnostics and repairs tailored to your vehicle’s needs.
Automotive Smoke Tests
What is an automotive smoke test? An automotive smoke test uses a controlled smoke source to introduce visible vapor into a vehicle’s intake, exhaust, EVAP, or vacuum systems to locate leaks. The smoke travels out of any openings, making even small cracks, loose fittings, or missing gaskets easy to find. Technicians use dedicated smoke machines designed for vehicle diagnostics to produce oil-based or glycol-based smoke that is safe when used properly.
When to perform a smoke test
Check Engine Light related to EVAP system codes (P0440, P0442, P0455, etc.)
Hard starting, rough idle, or vacuum-related drivability issues
Poor fuel economy with no other clear cause
Unexplained exhaust odors or visible fumes in the cabin
After repair or replacement of intake manifold, vacuum hoses, EGR components, or EVAP lines
Diagnosing leak sources after visual inspection and pressure testing are inconclusive
Types of systems commonly tested
EVAP system (evaporative emissions): charcoal canister, purge valve, hoses, gas cap seal, vent solenoid and lines
Intake manifold and vacuum lines: gaskets, hose connections, brake booster line, PCV system
Exhaust system (where permitted): welds, flanges, gasket seals
Turbocharger and intercooler piping: hose clamps, couplings, charge pipes
Heater core and HVAC ducting (cabin smoke testing to find cabin air leaks)
How a smoke test is performed (typical steps)
Preliminary checks: scan for codes, inspect hoses and fittings, verify fuel level and safety conditions.
Isolate the system: install adapters or caps to seal off the system being tested (fuel lines, EVAP ports, intake).
Introduce smoke: connect the smoke machine to the service port or vacuum/EVAP line and introduce smoke at a controlled pressure/flow.
Observe leak points: visually inspect for smoke exiting joints, cracks, connections, gaskets, or seams; use gloves and a flashlight for tight spots.
Confirm and repair: mark the leak location, perform the repair (replace hose, tighten clamp, replace gasket, etc.).
Re-test: reintroduce smoke to confirm the repair fixed the leak.
Clear codes and test-drive if required.
Safety considerations
Use smoke machines designed for automotive diagnostics; do not use open flames or improvised smoke sources.
Ensure proper ventilation—do smoke testing outdoors or in a well-ventilated shop area.
Avoid pressurizing fuel system components with smoke; isolate fuel lines and follow manufacturer service procedures.
Use appropriate adapters and pressure limits to avoid damage to sensors, seals, and delicate components.
Wear eye protection and gloves when working in the engine bay.
Common findings and fixes
Loose gas cap: replace or tighten cap; clear EVAP codes.
Cracked vacuum hose: replace hose and clamps.
Faulty purge or vent solenoid: test and replace solenoid.
Damaged EVAP canister or lines: replace damaged components.
Intake manifold gasket leak: remove manifold, replace gasket, torque to spec.
Exhaust flange or gasket leak: replace gasket or repair welds.
Benefits of professional smoke testing
Locates small or hidden leaks that are difficult to find by sight or pressure testing alone.
Reduces time spent chasing intermittent or elusive problems.
Prevents unnecessary parts replacement by pinpointing the true failure point.
Helps restore emissions compliance and improve drivability and fuel economy.
When to bring it to a shop If you have a persistent Check Engine Light related to EVAP or vacuum systems, ongoing drivability problems, or noticeable fuel odors, a professional smoke test can quickly locate the issue. Properly
Automotive Smoke Tests
What is an automotive smoke test? An automotive smoke test uses a controlled smoke source to introduce visible vapor into a vehicle’s intake, exhaust, EVAP, or vacuum systems to locate leaks. The smoke travels out of any openings, making even small cracks, loose fittings, or missing gaskets easy to find. Technicians use dedicated smoke machines designed for vehicle diagnostics to produce oil-based or glycol-based smoke that is safe when used properly.
When to perform a smoke test
Check Engine Light related to EVAP system codes (P0440, P0442, P0455, etc.)
Hard starting, rough idle, or vacuum-related drivability issues
Poor fuel economy with no other clear cause
Unexplained exhaust odors or visible fumes in the cabin
After repair or replacement of intake manifold, vacuum hoses, EGR components, or EVAP lines
Diagnosing leak sources after visual inspection and pressure testing are inconclusive
Types of systems commonly tested
EVAP system (evaporative emissions): charcoal canister, purge valve, hoses, gas cap seal, vent solenoid and lines
Intake manifold and vacuum lines: gaskets, hose connections, brake booster line, PCV system
Exhaust system (where permitted): welds, flanges, gasket seals
Turbocharger and intercooler piping: hose clamps, couplings, charge pipes
Heater core and HVAC ducting (cabin smoke testing to find cabin air leaks)
How a smoke test is performed (typical steps)
Preliminary checks: scan for codes, inspect hoses and fittings, verify fuel level and safety conditions.
Isolate the system: install adapters or caps to seal off the system being tested (fuel lines, EVAP ports, intake).
Introduce smoke: connect the smoke machine to the service port or vacuum/EVAP line and introduce smoke at a controlled pressure/flow.
Observe leak points: visually inspect for smoke exiting joints, cracks, connections, gaskets, or seams; use gloves and a flashlight for tight spots.
Confirm and repair: mark the leak location, perform the repair (replace hose, tighten clamp, replace gasket, etc.).
Re-test: reintroduce smoke to confirm the repair fixed the leak.
Clear codes and test-drive if required.
Safety considerations
Use smoke machines designed for automotive diagnostics; do not use open flames or improvised smoke sources.
Ensure proper ventilation—do smoke testing outdoors or in a well-ventilated shop area.
Avoid pressurizing fuel system components with smoke; isolate fuel lines and follow manufacturer service procedures.
Use appropriate adapters and pressure limits to avoid damage to sensors, seals, and delicate components.
Wear eye protection and gloves when working in the engine bay.
Common findings and fixes
Loose gas cap: replace or tighten cap; clear EVAP codes.
Cracked vacuum hose: replace hose and clamps.
Faulty purge or vent solenoid: test and replace solenoid.
Damaged EVAP canister or lines: replace damaged components.
Intake manifold gasket leak: remove manifold, replace gasket, torque to spec.
Exhaust flange or gasket leak: replace gasket or repair welds.
Benefits of professional smoke testing
Locates small or hidden leaks that are difficult to find by sight or pressure testing alone.
Reduces time spent chasing intermittent or elusive problems.
Prevents unnecessary parts replacement by pinpointing the true failure point.
Helps restore emissions compliance and improve drivability and fuel economy.
When to bring it to a shop If you have a persistent Check Engine Light related to EVAP or vacuum systems, ongoing drivability problems, or noticeable fuel odors, a professional smoke test can quickly locate the issue. Properly performed smoke testing protects vehicle systems and provides a clear path to repair.
Harrison MVAC Service and Repairs LLC performs comprehensive smoke testing with industry-standard equipment, experienced technicians, and documented results to ensure leaks are found and reliably repaired. Contact our shop for diagnostics and repairs tailored to your vehicle’s needs.